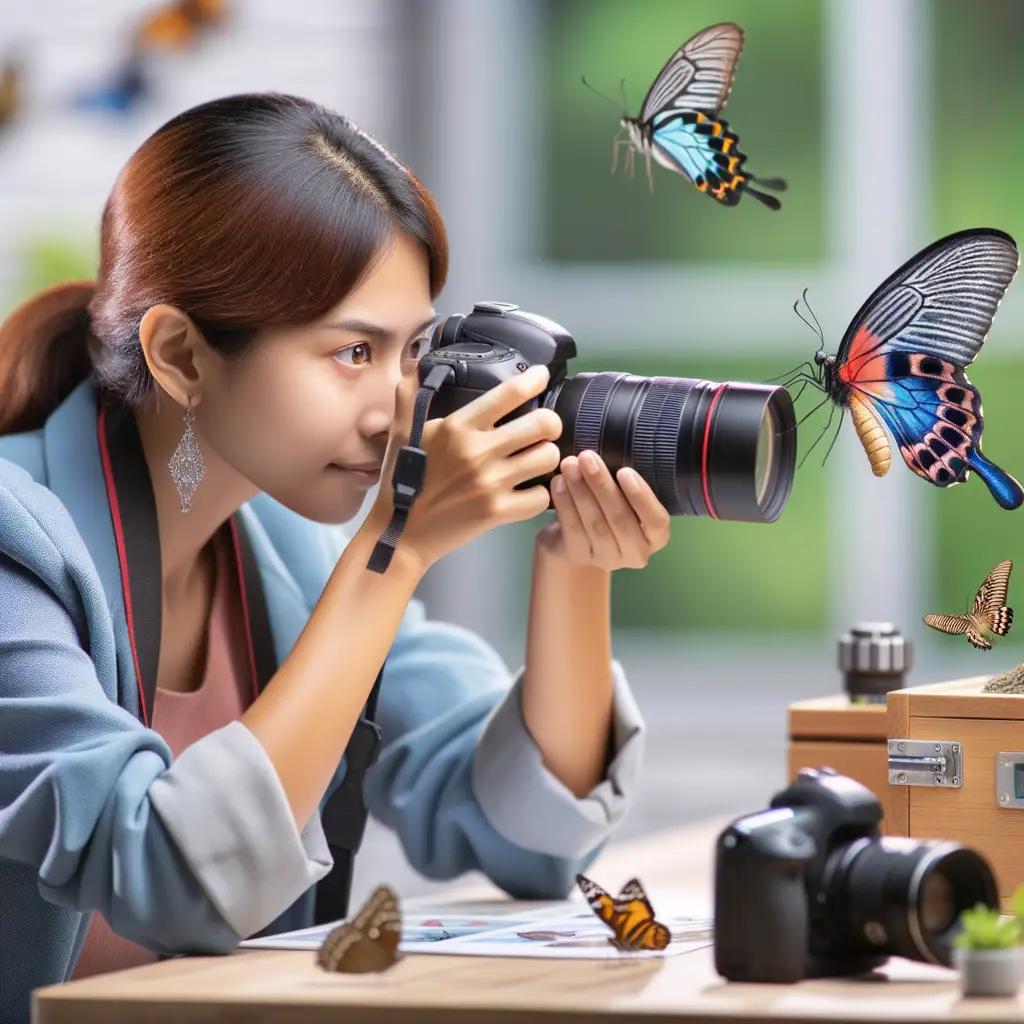
Introduction to Insect Photography
Insect photography is a fascinating field that combines the beauty of nature with the thrill of capturing it in a still image. It’s a hobby that requires patience, skill, and a keen eye for detail. In this section, we will explore the basics of insect photography and discuss why it’s an important aspect of both science and art.
- Understanding the Basics of Insect Photography
- Importance of Insect Photography
Insect photography, at its core, is about capturing images of insects in their natural habitat. It’s a form of macro photography, which means it involves taking close-up shots of small subjects. Insect photographers use special equipment and techniques to capture detailed, high-quality images of insects. They must also have a basic understanding of insect behavior and habitats to find and photograph their subjects effectively. It’s a challenging yet rewarding hobby that allows you to explore the world of insects in a unique and intimate way. Learn more about macro photography here.
Insect photography is important for several reasons. Firstly, it helps to document the incredible diversity of insect species, many of which are not well-studied or understood. These photographs can be used for scientific research, conservation efforts, and educational purposes. Secondly, insect photography is a form of art. The intricate details, vibrant colors, and unique shapes of insects make for stunning photographs that can be appreciated for their aesthetic value. Lastly, insect photography encourages people to engage with nature and develop a greater appreciation for the small creatures that play such a vital role in our ecosystems. Discover more about the importance of insects here.
Insect Photography Techniques
There are many ways to capture the beauty of insects in photographs. Two popular techniques are Macro Insect Photography and Close-Up Insect Photography. Let’s take a closer look at each of these techniques.
-
Macro Insect Photography
Macro photography is a technique that involves taking close-up pictures of small subjects, like insects, to make them appear larger than life. This technique allows us to see the intricate details of an insect’s body that are usually invisible to the naked eye.
For example, through macro photography, we can clearly see the complex patterns on a butterfly’s wings or the tiny hairs on a bee’s body. This technique requires a special lens called a macro lens, which can focus on very close subjects. Learn more about Macro Photography on Wikipedia.
-
Close-Up Insect Photography
Close-Up Insect Photography is another technique that allows us to capture detailed images of insects. Unlike Macro Photography, this technique doesn’t necessarily make the subject appear larger than life. Instead, it focuses on capturing the insect from a close distance, highlighting its features and surroundings.
This technique is great for capturing insects in their natural habitat, showing them interacting with their environment. It can be achieved with a standard lens, but a zoom lens can be used to get even closer shots without disturbing the insect. Learn more about Close-Up Photography on Wikipedia.
Both Macro and Close-Up Insect Photography techniques offer unique perspectives on the world of insects. They allow us to appreciate the beauty and complexity of these tiny creatures, and they can result in stunning photographs that captivate viewers. Whether you’re a professional photographer or a hobbyist, these techniques can help you take your insect photography to the next level.
Insect Photography Equipment
When it comes to insect photography, having the right equipment can make all the difference. Let’s delve into the essential gear you need and how to choose the right lens for capturing stunning insect images.
- Essential equipment for Insect Photography
- Camera: A DSLR or mirrorless camera with manual mode is ideal for insect photography. These cameras offer the flexibility to adjust settings according to the lighting and subject.
- Lens: A macro lens is a must for insect photography. It allows you to get close to the insect and capture intricate details.
- Tripod: A sturdy tripod is crucial for stability, especially when shooting in macro mode where even slight movements can blur the image.
- Flash: A good flash unit can provide the necessary light, especially in darker environments or for night-time insect photography.
- Diffuser: A diffuser softens the flash light, reducing harsh shadows and creating a more natural look.
- Choosing the right lens for Insect Photography
Here are some of the must-have tools for insect photography:
Choosing the right lens is crucial in insect photography. The lens you choose can significantly impact the quality and detail of your images.
A macro lens is the most recommended for insect photography. This type of lens allows you to get close to your subject, capturing minute details that would otherwise be missed with a standard lens. Macro lenses come in different focal lengths, typically ranging from 60mm to 180mm. The choice of focal length depends on your comfort level and the distance you prefer to maintain from the insects.
For beginners, a 60mm macro lens is a good start. It’s lighter, cheaper, and easier to handle. For more experienced photographers, a 100mm or 180mm macro lens can provide greater detail and allow you to maintain a comfortable distance from potentially dangerous insects.
Remember, the right equipment is just a tool. The real magic lies in your creativity, patience, and passion for capturing the fascinating world of insects.
Insect Photography Settings
Understanding the right settings for insect photography is crucial to capturing stunning and detailed images of these fascinating creatures. In this section, we will explore the key camera settings and lighting adjustments you need to master for successful insect photography.
-
Understanding Camera Settings for Insect Photography
When photographing insects, the camera settings can make a significant difference in the quality of your images. Here are some key settings to consider:
- Aperture: A smaller aperture (higher f-number) will give you a greater depth of field, allowing more of the insect to be in focus. However, this may require slower shutter speeds or higher ISO settings.
- Shutter Speed: A faster shutter speed can freeze the motion of a fast-moving insect, but it may require a larger aperture or higher ISO. A slower shutter speed can create interesting motion blur effects.
- ISO: A higher ISO allows for faster shutter speeds and smaller apertures, but it may introduce noise into your images. A lower ISO will give cleaner images but may require slower shutter speeds or larger apertures.
- Focus Mode: Manual focus is often best for insect photography, as it allows you to precisely control which part of the insect is in focus.
Remember, the best settings will depend on the specific situation and the effect you want to achieve. Experimentation is key to finding the perfect balance.
-
How to Adjust Lighting for Insect Photography
Lighting is another crucial aspect of insect photography. Here are some tips on how to adjust your lighting:
- Natural Light: Whenever possible, use natural light. Early morning and late afternoon light is often the most flattering. However, be aware that insects are often more active during these times.
- Flash: A flash can help to fill in shadows and freeze motion. However, it can also scare away insects and create harsh shadows. Use it judiciously.
- Diffusers and Reflectors: These can help to soften harsh light and fill in shadows, creating a more pleasing image.
Again, experimentation is key. Try different lighting conditions and see what works best for your subject.
Mastering the camera settings and lighting adjustments for insect photography can take time and practice, but the results can be truly stunning. So, grab your camera, head out into nature, and start capturing the incredible world of insects!
Insect Photography Tips
Mastering the art of insect photography requires a blend of patience, creativity, and a keen eye for detail. Here are some preparation tips that can help you capture stunning images of these tiny creatures.
Preparation Tips
Before you head out with your camera, there are a couple of things you need to do to ensure a successful insect photography session.
- Researching about the insect
- Scouting the location
Understanding the insect you intend to photograph is crucial. This includes knowing its behavior, habitat, and the best time to find it. For instance, some insects are more active during the day, while others come out at night. Some prefer a specific type of plant or weather condition. A good source for this information is Wikipedia.
Once you know more about your subject, the next step is to scout the location. This involves visiting the site beforehand to familiarize yourself with the environment and identify potential spots for great shots. Look for areas where insects are likely to be found, such as flowers, leaves, or near water bodies. Remember, the more comfortable you are with the location, the better your chances of capturing amazing photos.
Preparation is key in insect photography. By researching your subject and scouting your location, you set yourself up for success. So, grab your camera and start exploring the fascinating world of insects!
During the Shoot
- Patience is key
- Experiment with angles
When it comes to insect photography, patience is not just a virtue, it’s a necessity. Insects are unpredictable and often skittish. They may not always behave as you’d like them to. It’s important to remain patient and wait for the perfect moment to capture your shot. Remember, great photography is often the result of waiting for the right moment rather than forcing it. Macro photography, which is often used in insect photography, requires a lot of patience and precision. So, take your time, breathe, and wait for the perfect shot.
Insect photography offers a unique opportunity to experiment with various angles. Unlike larger subjects, insects are small and intricate, offering a variety of interesting perspectives. For instance, shooting from a low angle can make an ant look like a giant. On the other hand, a top-down shot can highlight the intricate patterns on a butterfly’s wings. Don’t be afraid to move around and try different angles until you find the one that best captures your subject’s unique characteristics. Remember, the best angle is often the one that shows us something we wouldn’t normally see with our naked eye.
Best Insects for Photography
Photographing insects can be a rewarding experience, offering a glimpse into a world often overlooked. Some insects, with their vibrant colors and intricate patterns, are particularly photogenic. Here are some of the best insects to consider for your next photography session:
- Butterflies and Moths
- Beetles
- Dragonflies and Damselflies
Butterflies and moths are some of the most popular subjects for insect photography. Their vibrant colors and intricate patterns make for stunning photographs. They are also relatively easy to find, with many species found in gardens and parks. The Monarch butterfly, with its striking orange and black pattern, is a favorite among photographers.
Beetles are another excellent choice for insect photography. They come in a wide range of shapes, sizes, and colors, offering plenty of variety for photographers. The Rainbow scarab, for example, is known for its metallic sheen, which can produce stunning images when captured under the right lighting conditions.
Dragonflies and damselflies are known for their agile flight and vibrant colors, making them exciting subjects for photography. They can often be found near bodies of water, and their reflective wings can create beautiful effects when photographed against the light. The Blue dasher is a particularly photogenic species, known for its bright blue body and translucent wings.
Remember, the key to successful insect photography is patience and observation. Spend time studying your subjects and their behaviors, and you’ll be rewarded with unique and beautiful images.
Insect Photography Tutorial
Now that we have covered the basics of insect photography, let’s dive into a step-by-step tutorial that will guide you through the process of capturing stunning insect images.
- Setting up your equipment
- Finding your subject
- Getting the perfect shot
Before you start your insect photography journey, it’s crucial to set up your equipment properly. First, choose a camera that allows you to take close-up shots with high resolution. A DSLR or mirrorless camera with a macro lens is ideal for this purpose. Next, consider using a tripod to stabilize your camera and prevent blurry images. Finally, don’t forget about lighting. Natural light is the best for insect photography, but you can also use a flash or reflector to enhance the light conditions.
Finding the perfect insect to photograph can be a fun adventure. Look for insects in their natural habitats such as gardens, parks, or forests. Pay attention to the time of day, as some insects are more active during certain times. For example, butterflies are usually most active in the morning. Be patient and observe the insects’ behavior to find the perfect moment for your shot.
Once you’ve found your subject and set up your equipment, it’s time to get the perfect shot. Start by focusing on the insect’s eyes, as they are often the most expressive part of the insect. Try different angles and perspectives to add interest to your image. Remember to be patient and take multiple shots to increase your chances of getting a great photo. Experiment with different settings on your camera to achieve the best results.
Remember, practice makes perfect. The more you practice your insect photography skills, the better your images will become. Happy shooting!
Case Studies
Let’s delve into some real-life examples to better understand the intricacies of insect photography. We will explore two case studies, each unique in its approach and environment.
-
Case study 1: Capturing Insect Photos in the Wild
Photographing insects in their natural habitat can be a challenging yet rewarding experience. Let’s consider the case of John Doe, an amateur insect photographer.
John ventured into a local forest with his camera, equipped with a macro lens. His goal was to capture the beauty of butterflies in their natural environment. He had to be patient and quiet to not scare away the insects. He also had to adjust his camera settings according to the natural light conditions.
John’s efforts paid off when he captured a stunning image of a Monarch butterfly perched on a flower. This image, with its vibrant colors and intricate details, is a testament to the beauty that can be found in the wild. You can view John’s work here.
-
Case study 2: Macro Insect Photography in a Controlled Environment
Now, let’s look at a different approach to insect photography. Jane Doe, a professional insect photographer, prefers to work in a controlled environment. She believes that this allows her to capture the minutest details of insects.
Jane uses a small studio setup at her home where she keeps the insects. She uses artificial lighting and macro lenses to capture close-up shots of insects. Her focus is on capturing the intricate details of the insects, which are often overlooked.
One of her most acclaimed photographs is a close-up shot of a ladybug. The image reveals the tiny hairs on the ladybug’s body, a detail that is often missed in regular photographs. You can view Jane’s work here.
These case studies show that whether you choose to photograph insects in the wild or in a controlled environment, patience, attention to detail, and a love for insects are key to capturing stunning images.
Conclusion
In this comprehensive guide, we have explored the fascinating world of insect photography. We have delved into various techniques, equipment, and settings that can help you capture stunning images of these tiny creatures. Let’s take a moment to recap what we have learned.
- Recap of Insect Photography Guide
- Final thoughts on mastering Insect Photography
Our journey began with an introduction to insect photography, where we learned about its importance and appeal. We then discussed different techniques to photograph insects, including macro photography and focus stacking. We also explored the essential equipment needed, such as a good camera, macro lens, and tripod. We highlighted the importance of understanding and adjusting camera settings to get the perfect shot. We also shared some valuable tips to enhance your insect photography skills, such as patience, observation, and understanding insect behavior. We then listed some of the best insects for photography and provided a step-by-step tutorial to guide you through the process. Lastly, we examined some case studies to understand how professionals approach insect photography.
Mastering insect photography requires patience, practice, and a keen eye for detail. It’s about understanding the behavior of these tiny creatures and using the right techniques and equipment to capture their beauty. Remember, the key to great insect photography is not just about the technical aspects, but also about your passion and respect for these amazing creatures. As Ansel Adams, a famous photographer once said, “You don’t take a photograph, you make it.” So, go out there, explore the world of insects, and create your own stunning images.
With the knowledge gained from this guide, we hope you feel equipped and inspired to embark on your own insect photography journey. Happy shooting!